GPSD and NTP on Raspberry Pi5 with Debian OS 13 trixie
OS installation
I decided to buy a Raspberry Pi5.
I installed this image
2025-12-04-raspios-trixie-arm64-lite.img with unziped file size 2986344448
And the idea was to setup a stratum 1 NTP server.
I used the GPS-hat I already have since years.
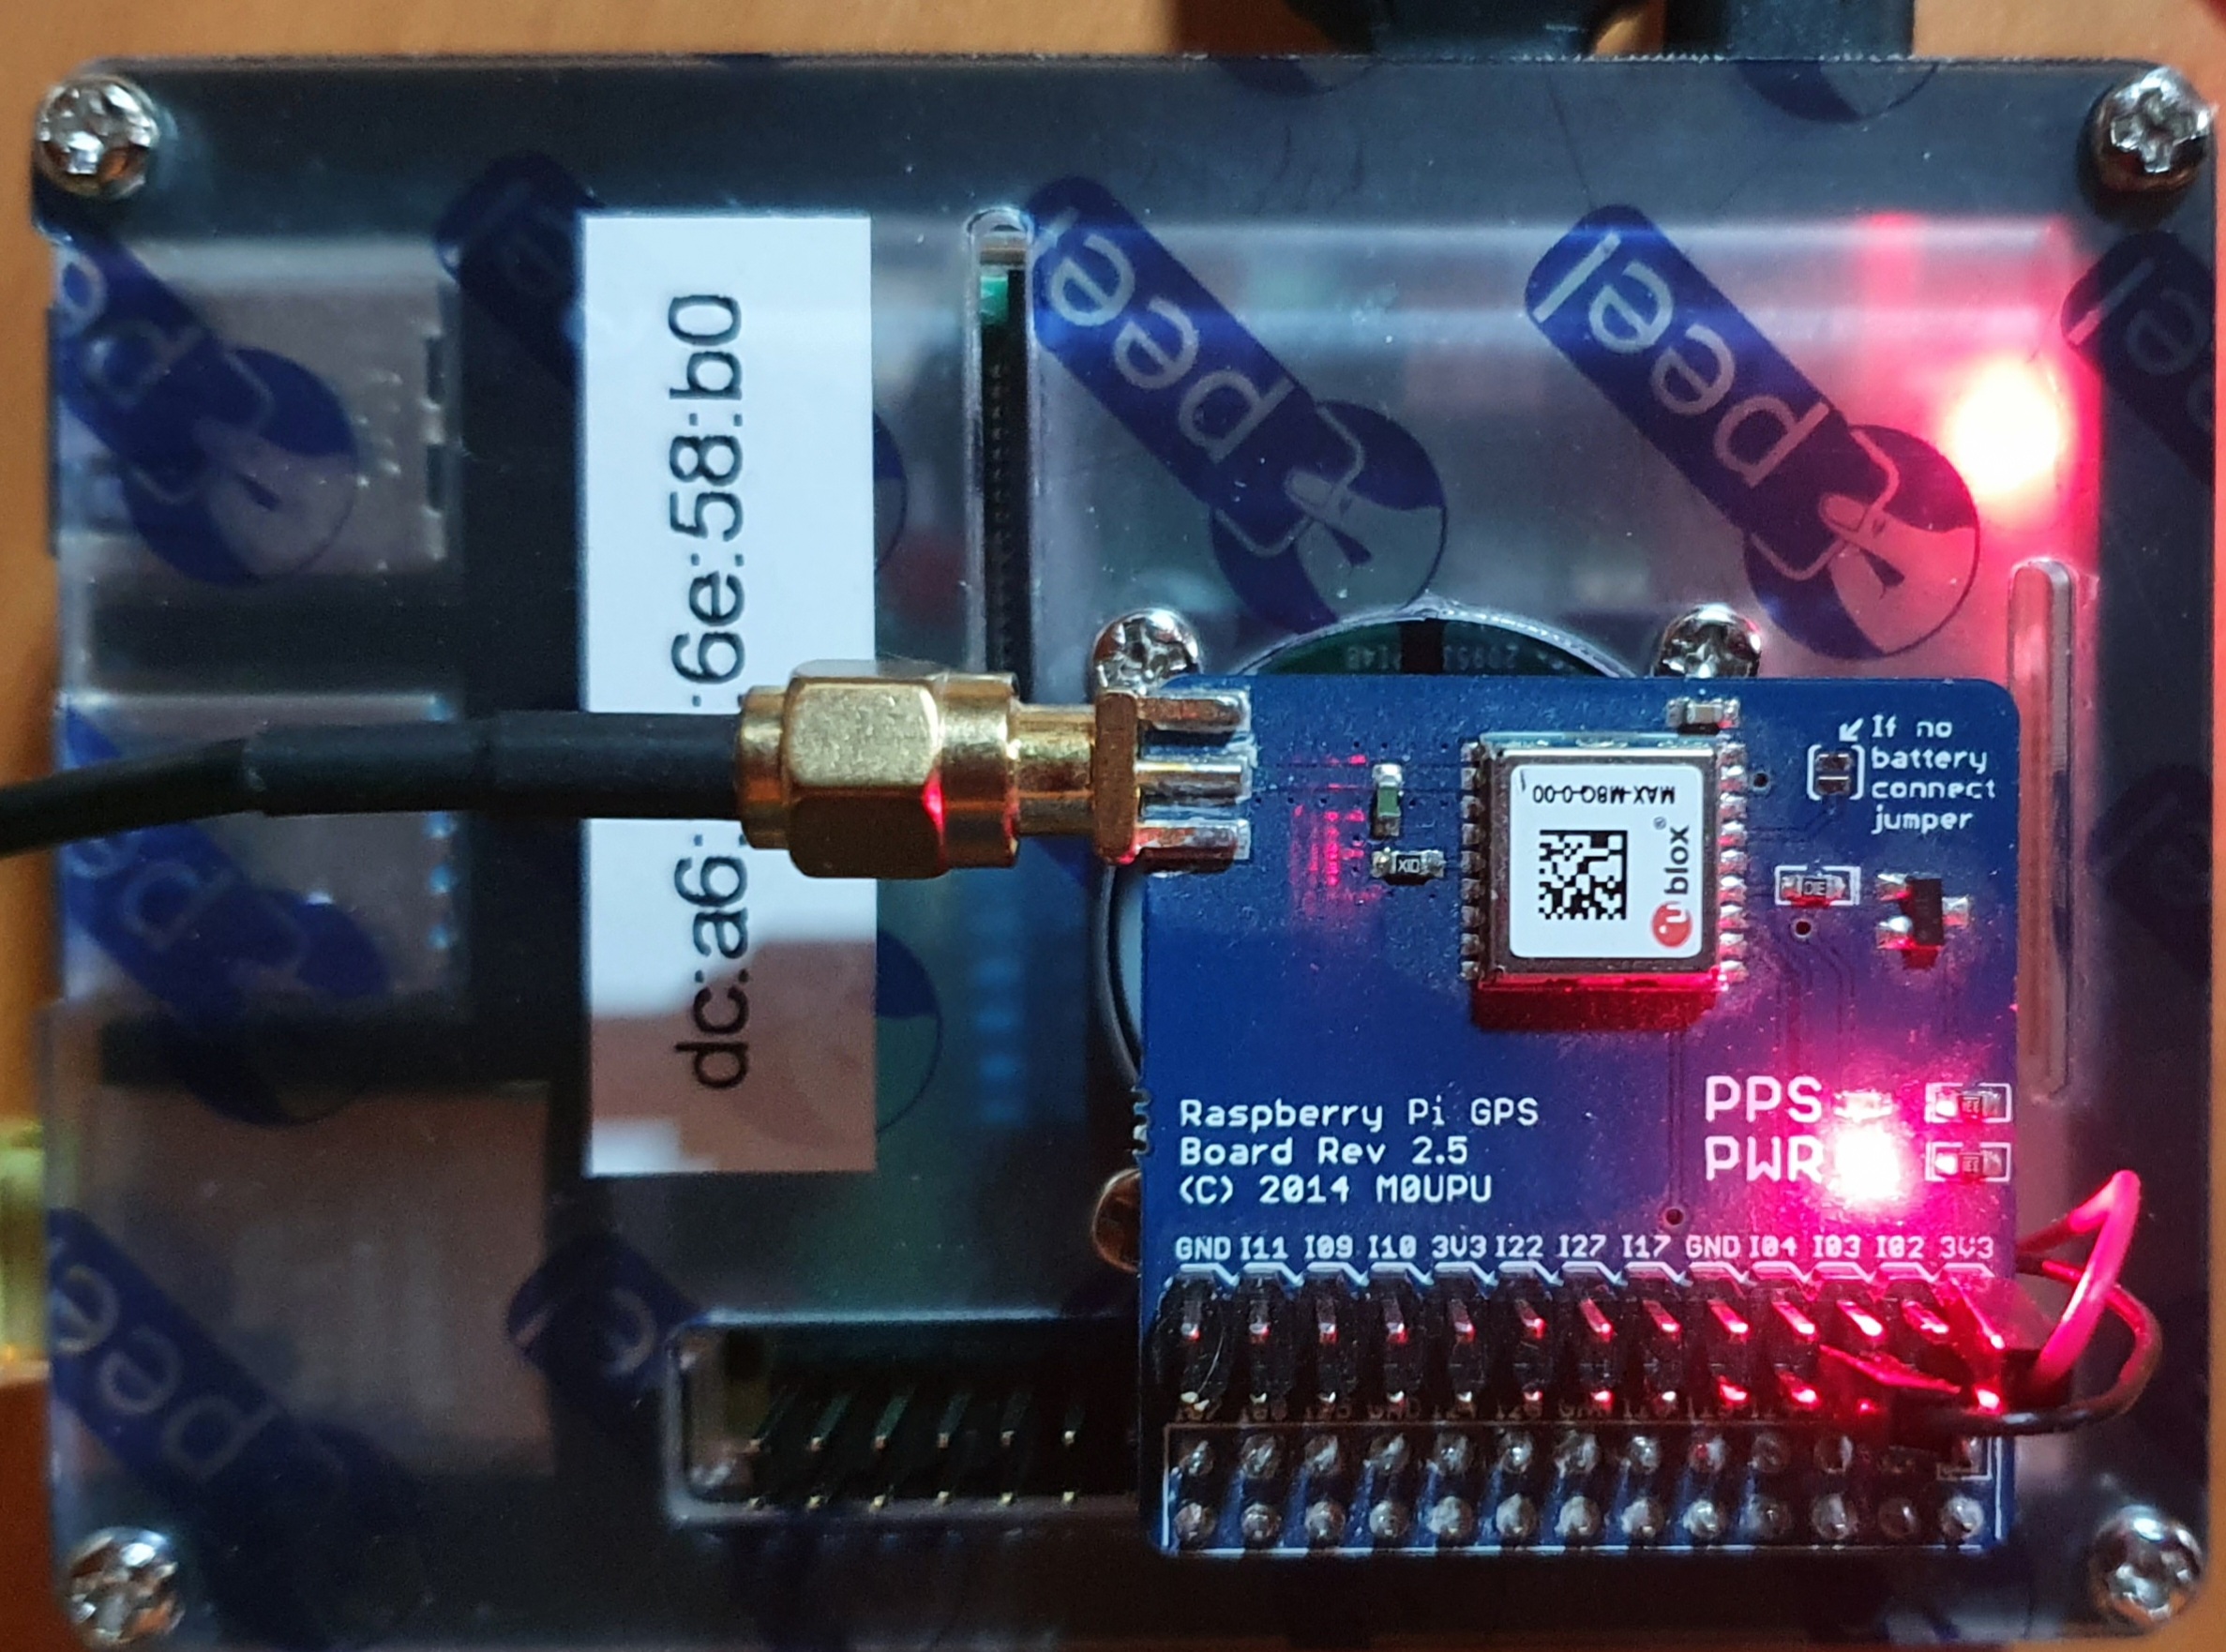
As you can see the vendor is M0UPU. I bought this GPS modules at uputronics.com
This is not available anymore. At that time an ublox MAX-M8Q was used as chip on the gps HAT.
I decided to compile GPSD and NTPD by myself and not to use an available package. As it was a brand new installation a lot of packages are needed:
NTPD
For NTP I took NTPsec from https://gitlab.com/NTPsec/ntpsec
As first step I installed the official package from OS with apt-get install ntpsec ntpsec-doc ntpsec-ntpdate
With this I got the necessary scripts to start which I had to change only slightly for the self compiled version.
Additional the following packages were needed: git, m4, m4-doc, bison, bison-doc
The basic steps to compile are:
git clone https://gitlab.com/NTPsec/ntpsec.git
cd ntpsec/
./waf configure --refclock=gpsd,generic,shm,pps,nmea,local
./waf build
sudo ./waf install
For the further usage it’s important to set $PYTHONPATH correct. In my case
export PYTHONPATH=/usr/local/lib/python3.13/site-packages/
With ntp.conf from the package one can test if ntpd works well, but in the moment not as stratum 1 service.
GPSD
To run a GNSS disciplined stratum 1 NTP server the gpsd package is not necessary. What we need is a 1PPS ( one puls per second ) which we get from the gps HAT with the available drivers from the OS. But the gpsd package with all its tools makes the life easier.
You can find the source here: https://gitlab.com/gpsd/gpsd
But gpsd needs a lot of additional packages:
 scons ncurses-base ncurses-bin ncurses-doc ncurses-term python-matplotlib-data python3-matplotlib
 python3-serial python3-cairo:arm64 python3-gi-cairo libqt6network6 libqt6networkauth6
 qt6-networkauth-dev libncurses-dev libgtk-3-dev
For testing the following packages are additional useful: minicom , ppstest
For complete documentation I want to refer to the Internet
https://gpsd.io/building.html
https://gpsd.gitlab.io/gpsd/installation.html
But compiling is quite straight forward:
git clone git@gitlab.com:gpsd/gpsd.git
scons ; scons check ; sudo scons install
If you decide later on to update to the latest version run:
git pull origin master --rebase
scons --config=force
OS configuration
To make it runnable some minor changes are necessary in the system. And this is maybe the most tricky part.
/boot/firmware/cmdline.txt
This was the original content:
console=serial0,115200 console=tty1 root=PARTUUID=e20c853e-02 rootfstype=ext4 fsck.repair=yes rootwait
Strip away which makes troubles. Then it looks like this
root=PARTUUID=e20c853e-02 rootfstype=ext4 fsck.repair=yes rootwait
There is still the console on the HDMI port available.
/boot/firmware/config.txt
Add a line in the global block:
dtoverlay=pps-gpio,gpiopin=18
And add a new block at the end of the file
[all]
enable_uart=1
If your HAT delivers the 1PPS on a different gpiopin then you have to change the number of course.
For a detailed list see bananapi-gpio-wiringbp
modules
Create a new file /etc/modules-load.d/pps-gpio.conf with one line:
pps-gpio
I modified /etc/group to be sure not having permission issues. User nobody is important as gpsd is running as nobody.
dialout:x:20:admin,root,nobody
ttyS0.service
To ensure that a getty or login process isn’t taken this device it should be deactivated
systemctl stop    serial-getty@ttyS0.service
systemctl disable serial-getty@ttyS0.service
systemctl mask    serial-getty@ttyS0.service
reboot
Now reboot the Pi5 and check the logs. With
dmesg | egrep 'tty|pps'
you should see something like this:
[    0.000093] printk: legacy console [tty0] enabled
[    0.012546] 107d001000.serial: ttyAMA10 at MMIO 0x107d001000 (irq = 16, base_baud = 0) is a PL011 rev3
[    0.012557] printk: legacy console [ttyAMA10] enabled
[    1.131186] pps_core: LinuxPPS API ver. 1 registered
[    1.136167] pps_core: Software ver. 5.3.6 - Copyright 2005-2007 Rodolfo Giometti <giometti@linux.it>
[    1.594509] 107d50c000.serial: ttyS0 at MMIO 0x107d50c000 (irq = 33, base_baud = 6000000) is a Broadcom BCM7271 UART
[    1.605118] serial serial0: tty port ttyS0 registered
[    2.656325] 1f00030000.serial: ttyAMA0 at MMIO 0x1f00030000 (irq = 125, base_baud = 0) is a PL011 AXI
[    4.337107] systemd[1]: Created slice system-getty.slice - Slice /system/getty.
[    4.400531] systemd[1]: Created slice system-serial\x2dgetty.slice - Slice /system/serial-getty.
[    4.604327] systemd[1]: Expecting device dev-ttyAMA10.device - /dev/ttyAMA10...
Check if the pps_gpio module is loaded
pi5# lsmod | grep pps_gpio
pps_gpio               49152  0
modinfo pps_gpio gives also some information
There are new devices
pi5# ls -ld /dev/serial? /dev/pps0
crw-rw---- 1 root root 250, 0 Dec 18 18:01 /dev/pps0
lrwxrwxrwx 1 root root      7 Dec 18 18:01 /dev/serial0 -> ttyAMA0
Checking pps0 is useable. It could also be that it is pps1. Of course a GPS-hat must be connected now.
pi5# ppstest /dev/pps0
trying PPS source "/dev/pps0"
found PPS source "/dev/pps0"
ok, found 1 source(s), now start fetching data...
source 0 - assert 1766270742.000503580, sequence: 9871 - clear  0.000000000, sequence: 0
source 0 - assert 1766270743.000502921, sequence: 9872 - clear  0.000000000, sequence: 0
source 0 - assert 1766270744.000502632, sequence: 9873 - clear  0.000000000, sequence: 0
source 0 - assert 1766270745.000502269, sequence: 9874 - clear  0.000000000, sequence: 0
If this is the result then it’s fine.
To see if data are received run
minicom -b 9600 -o -D /dev/serial0
You should see a lot of clear text data coming from the GPS module. Of course the speed could be a different. If you see some wired character then it’s the wrong speed. In my case it’s working with 9600 bd. Typical baud rates are: 9600, 38400 or 115200 bd. But also possible 230400 or 460800 for newer GNSS receiver.
Now it’s time to start gpsd and see if it is working
/usr/local/sbin/gpsd -n -s 9600 /dev/serial0 /dev/pps0
Now the following test should bring some results:
pi5# ntpshmmon
ntpshmmon: version 3.27.2~dev
#      Name  Seen@                 Clock                 Real                 L Prc
sample NTP0  1766270978.149410814  1766270978.148436931  1766270977.999800704 0  -1
sample NTP0  1766270979.149198025  1766270979.148583713  1766270978.999803051 0  -1
sample NTP0  1766270980.149027698  1766270980.148546201  1766270979.999805398 0  -1
To verify the working daemon run cgps -s -u m. You should see some satellite information.
To start next time successfully with systemctl modify file /etc/default/gpsd like this:
OPTIONS=/dev/serial0
DEVICES="/dev/pps0"
GPSD_OPTIONS="-G -n -s 9600"
USBAUTO="false"
Now it’s time for ntpd
The relevant part in /etc/ntpsec/ntp.conf is the following
# pps needs at least one server to get the time
# for easy start I take another stratum-1 in my network
server 192.168.241.190 minpoll 4 maxpoll 4 prefer

# Enabling PPS/ATOM support
server 127.127.22.0 minpoll 4 maxpoll 4
fudge 127.127.22.0 refid PPS time1 0.000500
fudge 127.127.22.0 flag3 1 flag4 1  # enable kernel PLL/FLL clock discipline and clockstats

# gpsd shared memory clock, if 192.168.241.190 fails this will jump in
server 127.127.28.0 minpoll 4 maxpoll 4 # PPS requires at least one preferred peer
fudge 127.127.28.0 refid GPS
fudge 127.127.28.0 time1 +0.15 flag4 1 # coarse processing delay offset
The time parameter “time1” you have to adjust for your situation. And of course several other configuration lines are necessary to start the deamon.
After some time you should see:
pi5# ntpq -pn
     remote                                   refid      st t when poll reach   delay   offset   jitter
=======================================================================================================
oPPS(0)                                  .PPS.            0 l    8   16  377   0.0000   0.0002   0.0004
+SHM(0)                                  .GPS.            0 l   15   16  377   0.0000  -2.0118   1.7784
*192.168.241.190                         .GPS.            1 u   13   16  377   0.7064   0.2019   9.8784